 Stephen Walton
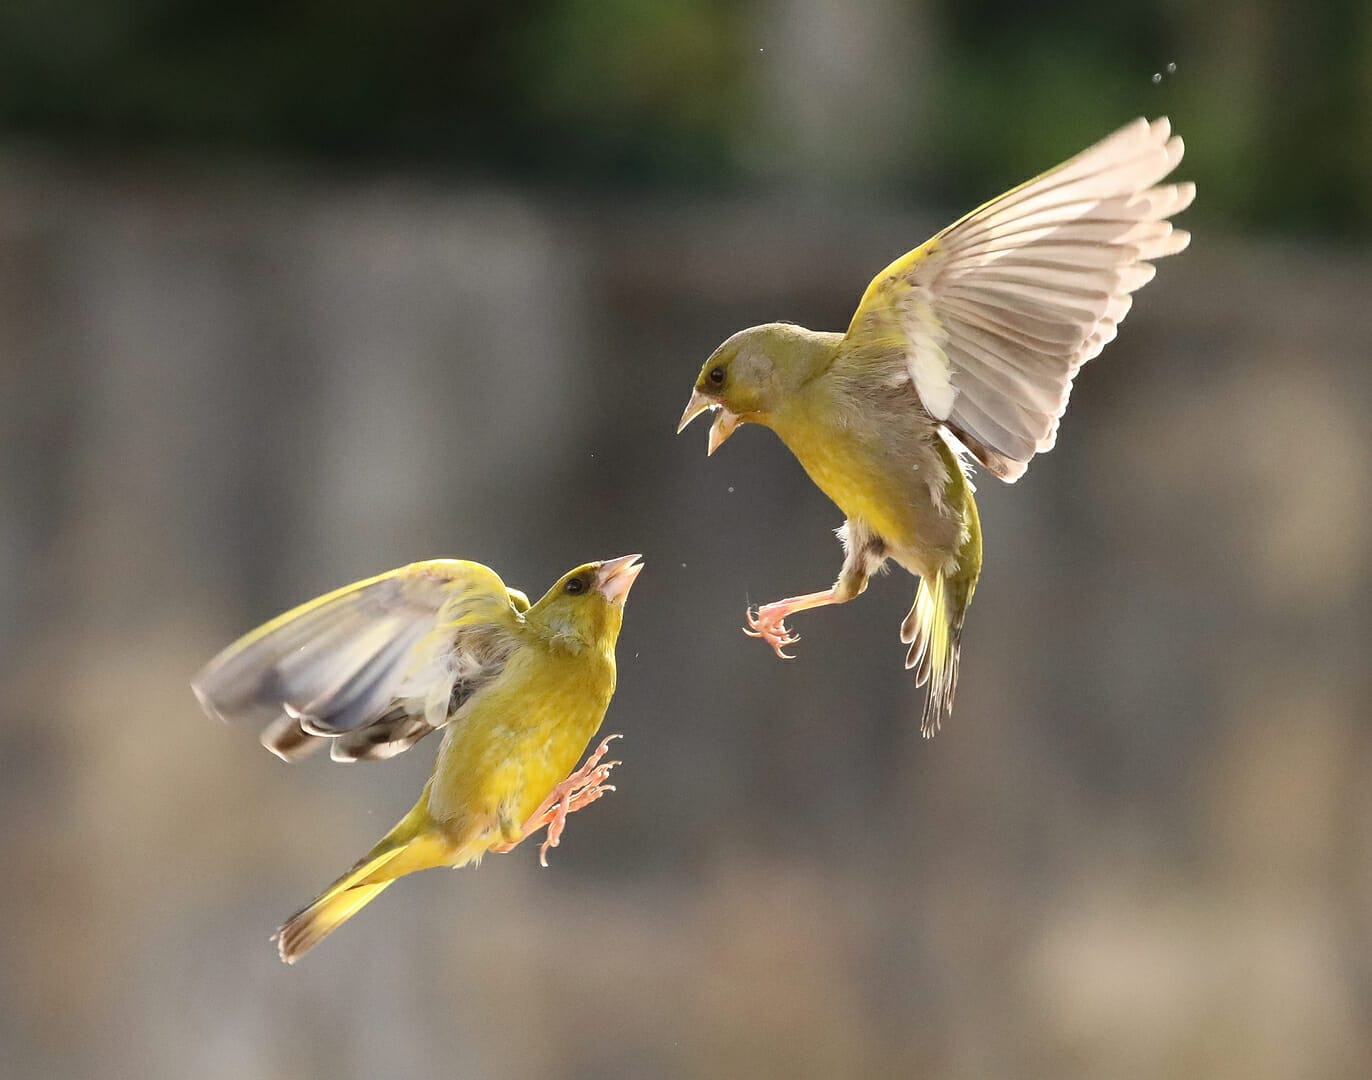
Photographing birds in flight is a challenging but rewarding pursuit for any photographer. Birds are fast-moving and unpredictable subjects and capturing them in motion requires a combination of technical skills, patience, and creativity.
In this guide, I’ll go over everything a beginner photographer needs to know to successfully photograph a bird in flight, from camera settings to composition and what could possibly go wrong.
When photographing birds in flight, it’s important to use the right camera settings to get the best possible shot. Use high-speed continuous shooting mode to capture multiple frames per second and increase your chances of getting a good shot.
Here are some other recommended camera settings when photographing birds in flight:
Birds move quickly, so you’ll need a fast shutter speed to capture them in motion without blur. A minimum shutter speed of 1/1000th of a second is recommended for most bird photography, although you may need to increase this speed for smaller or faster-moving birds.
For bird photography, a wide aperture (low f-stop number) is recommended to help blur the background and make the bird stand out. A range of f/5.6 to f/8 is generally a good starting point.
A high ISO may be necessary in low light conditions to maintain a fast shutter speed but try to keep it as low as possible to minimize noise. An ISO of 400 to 800 is usually sufficient in good lighting conditions.
Use continuous autofocus (AI Servo on Canon, AF-C on Nikon) to track the bird as it moves. You can also use single-point autofocus to focus on the bird’s eye, which is often the most important part of the image.
Use spot metering to ensure that the bird is properly exposed. The bird’s white feathers can cause the camera’s metering system to underexpose the image, so you may need to increase the exposure compensation to get the right exposure.
Once you have your camera settings dialled in, it’s time to think about composition. Here are some tips for composing your shot when photographing birds in flight:
Birds are small and can easily get lost in the background, so try to fill the frame with the bird as much as possible. This will help make the bird the main subject of the image and create a more dynamic composition.
Use the rule of thirds to place the bird in the frame. Position the bird off-centre, either to the left or right and make sure that the bird’s eyes are on the upper third line.
Pay attention to the background when composing your shot. A cluttered or distracting background can detract from the bird and make the image less impactful. Try to find a clean, simple background that will make the bird stand out.
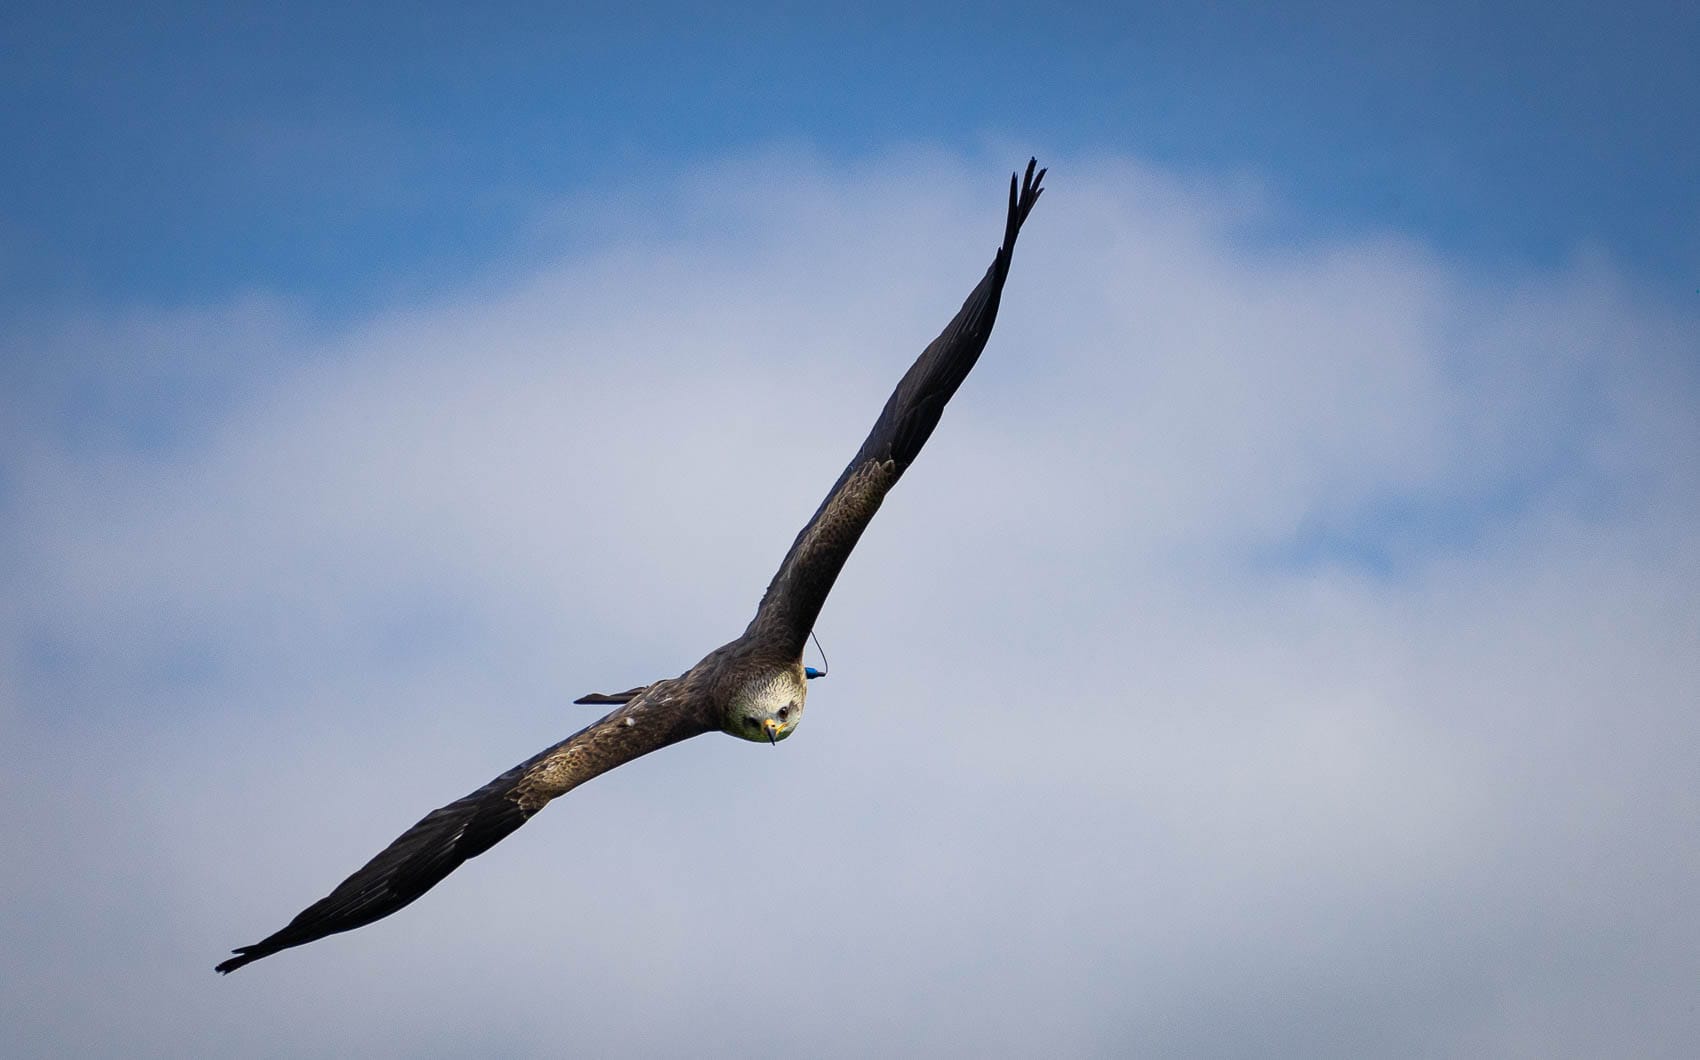
Experiment with different shooting angles to add variety to your shots. Shooting from a low angle can create a more dramatic image while shooting from above can give a bird’s-eye view of the scene.

Photographing birds in flight requires more than just technical skills and composition. Here are some other things to consider when shooting:
Timing: Birds are active during certain times of the day, so plan your shoot accordingly. Early morning and late afternoon are typically the best times to photograph birds, as the light is softer and the birds are more active.
Location: Choose a location where birds are likely to be found. Wetlands, forests, and open fields are all good options for bird photography. You can also try visiting a local bird sanctuary or nature reserve to increase your chances of finding birds.
Patience: Photographing birds in flight requires patience and persistence. Birds can be unpredictable and it may take some time to get the shot you’re looking for. You may need to wait for the bird to fly into the right position, or try shooting from different angles to get the best shot.
It’s also important to be aware of your surroundings when shooting birds in flight. Make sure you’re not disturbing the birds or their habitat, and always follow any rules or regulations in the area you’re shooting.
Despite your best efforts, there are a few things that can go wrong when photographing birds in flight. Here are some common issues and how to avoid them:
Blurry Images: If your images are coming out blurry, it could be due to a slow shutter speed or incorrect focus settings. Make sure you’re using a fast enough shutter speed to freeze the bird’s motion and use continuous autofocus to keep the bird in focus.
Overexposed or Underexposed Images: If your images are coming out overexposed or underexposed, it could be due to incorrect exposure settings. Use spot metering to ensure that the bird is properly exposed, and adjust the exposure compensation as needed.
Missed Shots: Birds can move quickly and it’s easy to miss the perfect shot. Use continuous shooting mode to capture multiple frames per second and increase your chances of getting a good shot. Also, be patient and keep shooting, as you never know when the perfect moment will happen.
Disturbing Wildlife: It’s important to be respectful of the wildlife and their habitat when photographing birds in flight. Make sure you’re not disturbing the birds or their habitat, and always follow any rules or regulations in the area you’re shooting.
As a beginner photographer, it’s important to start with birds that are easier to photograph. Here are some of the best types of birds to photograph when starting out:
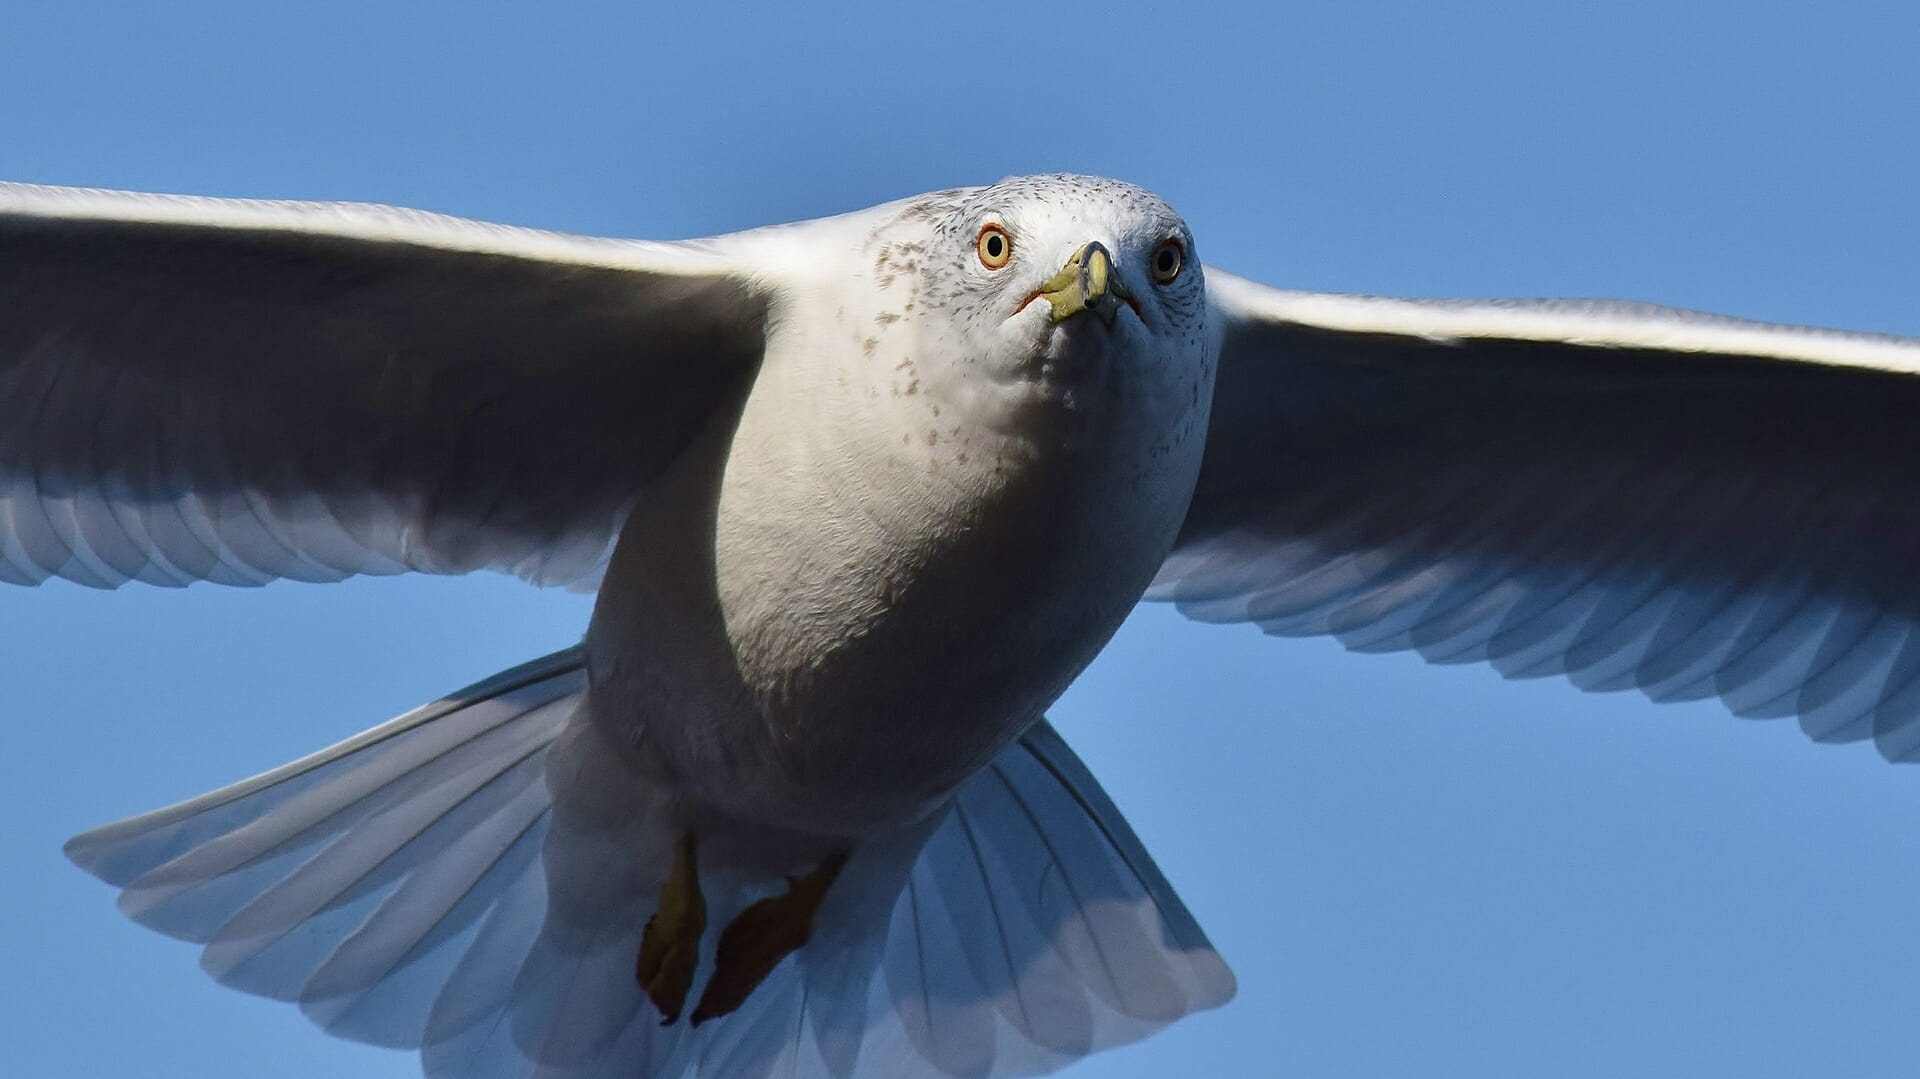
Seagulls: Seagulls are a great bird to start with as they are often found in large numbers in coastal areas. They are also relatively slow-moving and predictable, making them easier to capture in flight.
Pigeons: Pigeons are another bird that can be found in large numbers in urban areas. They are also relatively tame and will often let you get quite close to them, making them a great subject for close-up shots.
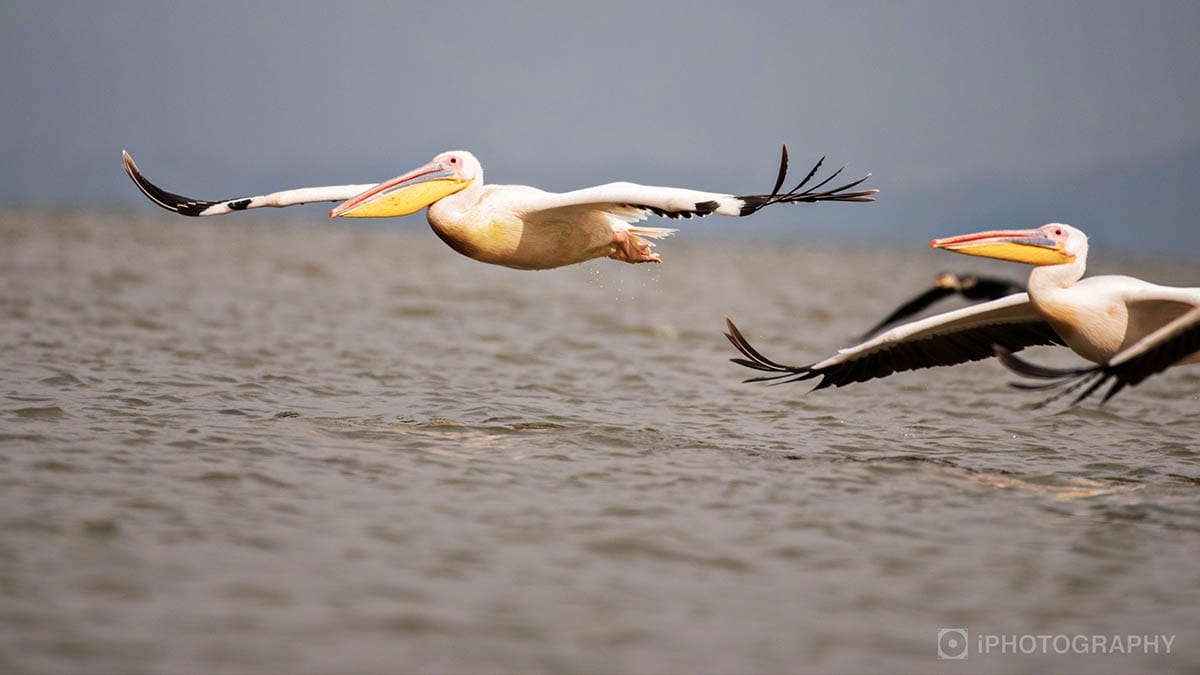
Ducks and Geese: Ducks and geese are often found in parks and ponds, and they are relatively easy to approach. They can be a bit more challenging to capture in flight, but they are slow-moving and often fly in predictable patterns, making them a good subject for beginners.
Robins and Sparrows: These smaller birds are often found in gardens and parks, and they can be easier to photograph than larger birds. They move quickly and erratically, but with a bit of patience, you can capture some great shots.
Raptors: While raptors like eagles and hawks can be more challenging to photograph, they are also some of the most impressive birds in flight. If you have access to a location where these birds are known to fly, they can be a great subject to practice your skills.

The best types of birds to photograph will depend on your location and personal preferences. Look for birds that are common in your area, and don’t be afraid to experiment with different types of birds and shooting techniques.
Photographing birds in flight is a challenging but rewarding pursuit for any photographer. With the right camera settings, composition, and patience, you can capture stunning images of birds in motion.
Remember to be respectful of the wildlife and their habitat, and always follow any rules or regulations in the area you’re shooting.
Learn all about banding, artefacts, pixelation, and moire as a photographer to help you capture and edit with the best image quality.
Learn the art of capturing stunning cityscapes with these beginner-friendly tips and techniques. Master the urban jungle through your lens!
Get a breakdown of each factor of exporting to give you the best export settings for photographers using Adobe Lightroom for photographers.

© iPhotography™